
Professional-Looking Photos Without Professional Prices
Product photography can make or break ecommerce sales. High-quality images build trust, showcase products accurately, and drive conversions—yet many small businesses assume professional photography requires expensive equipment and studio rentals. The truth is that with a smartphone, natural lighting, and basic DIY techniques, you can create compelling product photos that rival professional shots. Customers can’t touch or try products online, making photos your most important sales tool. Poor photography suggests poor quality products, while great photography elevates perceived value and justifies premium pricing. Whether you’re just starting or looking to improve existing product images, mastering DIY photography techniques can dramatically improve your conversion rates without destroying your budget. Let’s explore how to create professional-quality product photos using equipment you already own and simple techniques anyone can learn.

Why Product Photography Matters
First Impression and Trust
Photos are often the first thing customers notice:
- 93% of consumers consider visual appearance the key deciding factor
- High-quality photos build trust and credibility
- Poor photos suggest poor quality products
- Professional images justify higher prices
- Photos communicate more than words can
Conversion Impact
Better photos directly increase sales:
- Quality product images can increase conversion by 30%+
- Multiple angles reduce uncertainty and returns
- Lifestyle photos help customers envision ownership
- Detail shots answer questions before they’re asked
- Consistent photography builds brand recognition
Reduced Returns
Accurate photos set proper expectations:
- Show true colors, textures, and scale
- Reduce “not as expected” returns
- Detail shots reveal quality and features
- Multiple angles prevent surprises
- Save money on return processing and shipping
Competitive Advantage
Stand out from competitors:
- Many competitors have poor product photos
- Professional images differentiate your brand
- Better photos win the comparison
- Elevate perceived value
- Justify premium positioning
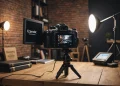
Essential Equipment (Budget-Friendly)
Camera Options
Smartphone (best budget option):
- Modern phones have excellent cameras
- iPhone 11+ or equivalent Android
- 12+ megapixels sufficient for ecommerce
- Already in your pocket
- Cost: $0 (you already have it)
Smartphone tips:
- Clean lens before shooting
- Use rear camera (better quality than front)
- Shoot in highest resolution
- Use gridlines for composition
- Lock focus and exposure by tapping screen
- Avoid digital zoom (move closer instead)
Entry-level DSLR or mirrorless (if upgrading):
- Canon Rebel series or Nikon D3500
- Sony a6000 series (mirrorless)
- $400-$800 with kit lens
- Better in low light
- More control over settings
- Only necessary if smartphone isn’t sufficient
Lighting
Natural light (free and best for beginners):
- Shoot near large window
- Soft, diffused light is ideal
- Overcast days provide even lighting
- Avoid direct harsh sunlight
- Shoot during “golden hour” (early morning/late afternoon) for warm glow
- Cost: $0
Affordable artificial lighting:
- LED panel lights: $30-$80 for two lights
- Ring light: $20-$60 (great for small products)
- Softbox kit: $50-$150 (two lights with diffusers)
- Clamp lights + daylight bulbs: $15-$30 (DIY option)
Recommendation: Start with natural light, invest in artificial lighting as you grow
Backgrounds
White background (most versatile):
- White poster board: $5-$10 (simple and effective)
- White foam board: $8-$15 (sturdier)
- White seamless paper: $20-$40 (professional look)
- White fabric/sheet: $10-$20 (wrinkle-free works best)
Colored or textured backgrounds:
- Colored poster board: $1-$3 per sheet
- Wood boards or planks: $10-$30
- Marble contact paper: $10-$20
- Fabric in brand colors: $10-$30
DIY sweep (seamless background):
- Tape poster board to wall, curve down to table
- Creates seamless background without visible corner
- Professional look for under $10
Tripod or Stabilization
Phone tripod:
- $10-$30 for basic tripod with phone mount
- Ensures sharp, consistent images
- Allows hands-free shooting
- Essential for product photography
DIY stabilization:
- Stack books to prop phone
- Lean against stable surface
- Use self-timer to avoid shake
- Free but less consistent
Reflectors and Diffusers
DIY reflectors (free):
- White poster board or foam board
- Aluminum foil on cardboard (shiny reflector)
- White bedsheet or fabric
- Position opposite light source to fill shadows
DIY diffusers (free):
- White shower curtain
- Parchment paper over window
- White fabric
- Softens harsh light
Professional reflector kit (optional):
- $15-$40 for 5-in-1 reflector
- Gold, silver, white, black, translucent
- Collapsible and portable
Props and Styling
Minimal investment needed:
- Items you already own for lifestyle shots
- Complementary products
- Natural elements (plants, flowers, wood)
- Neutral props that don’t distract
- Thrift stores for affordable props
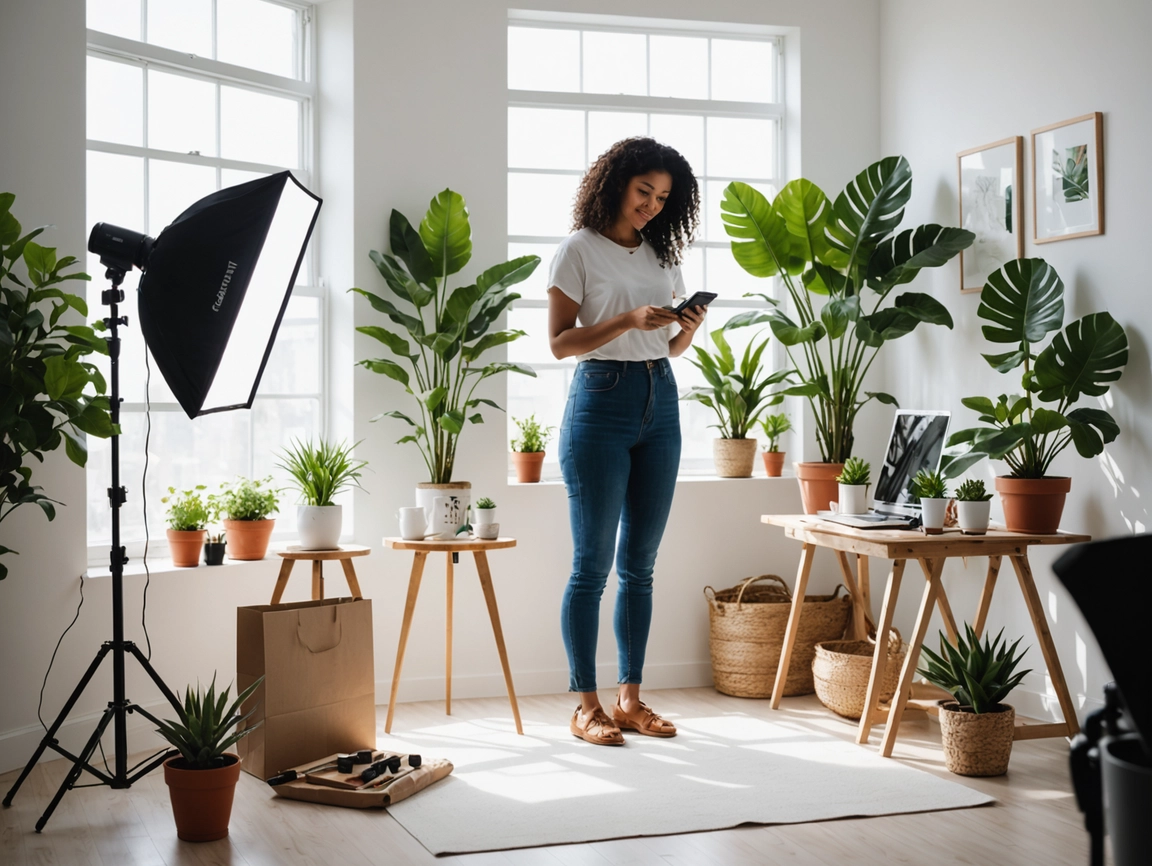
Setting Up Your DIY Photo Studio
Window Light Setup (Free)
Best setup for natural light:
- Find large window: North-facing ideal (consistent light)
- Set up table: Position table perpendicular to window
- Create sweep: Tape white poster board to wall, curve onto table
- Position product: 2-3 feet from window
- Add reflector: White board opposite window to fill shadows
- Set up camera: Tripod facing product
Timing:
- Shoot during consistent daylight hours
- Avoid early morning/late afternoon (changing light)
- Overcast days provide softest, most even light
- Shoot all products in one session for consistency
Artificial Light Setup
Two-light setup (recommended):
- Key light: Main light at 45-degree angle to product
- Fill light: Secondary light opposite side (lower intensity or further away)
- Background: White sweep or backdrop
- Reflector: Optional, to fill remaining shadows
One-light setup (budget option):
- Single light at 45-degree angle
- White reflector opposite to fill shadows
- Works well for many products
Lighting tips:
- Diffuse lights with white fabric or shower curtain
- Position lights at 45-degree angle, slightly above product
- Avoid placing light directly above (creates harsh shadows)
- Use same color temperature bulbs (all daylight or all warm)
Lightbox/Tent Setup
For small products:
- Photo lightbox/tent: $20-$60
- Built-in lights and white background
- Perfect for jewelry, small accessories, products under 12″
- Consistent, even lighting
- Quick and easy setup
DIY lightbox:
- Cardboard box
- Cut out sides, cover with white tissue paper
- Line inside with white paper
- Place lights outside, shining through tissue
- Cost: under $5
Photography Techniques
Composition Basics
Rule of thirds:
- Imagine grid dividing frame into thirds
- Place product at intersection points
- Creates more interesting composition than centering
- Use gridlines on phone camera
Fill the frame:
- Product should occupy most of frame
- Get close enough to see details
- Leave some breathing room around edges
- Avoid too much empty space
Consistent framing:
- Frame all products similarly
- Same distance, same angle
- Creates cohesive product catalog
- Professional, branded look
Angles and Perspectives
Essential angles for ecommerce:
1. Straight-on/eye-level:
- Camera at product’s eye level
- Shows product as customer would see it
- Main product image
2. 45-degree angle:
- Slightly above and to side
- Shows depth and dimension
- Natural, appealing perspective
3. Overhead/flat lay:
- Camera directly above product
- Great for clothing, accessories, flat items
- Popular on Instagram
4. Detail shots:
- Close-ups of textures, materials, features
- Show quality and craftsmanship
- Answer customer questions
Recommendation: Shoot 5-7 images per product from different angles
White Background Product Photos
Why white backgrounds:
- Clean, professional look
- Product is focus, no distractions
- Consistent across catalog
- Required for many marketplaces (Amazon, etc.)
- Easy to edit and remove background if needed
Shooting technique:
- Overexpose slightly (makes white whiter)
- Ensure even lighting (no shadows on background)
- Keep product away from background (prevents shadows)
- Shoot in RAW if possible (more editing flexibility)
Editing white backgrounds:
- Increase exposure/brightness
- Adjust white balance
- Use curves to make white pure white
- Remove any remaining shadows or discoloration
Lifestyle and Contextual Photos
Why lifestyle photos matter:
- Help customers envision product in use
- Show scale and context
- Create emotional connection
- Tell brand story
- Increase perceived value
DIY lifestyle photography:
- Use products in real settings (home, office, outdoors)
- Include people when relevant (hands, wearing, using)
- Style with complementary items
- Natural, authentic scenes
- Consistent aesthetic across images
Tips:
- Keep backgrounds simple and uncluttered
- Use natural light when possible
- Focus on product, not props
- Show product in action or context
- Maintain brand aesthetic
Camera Settings
Smartphone settings:
- Use native camera app or pro mode
- Shoot in highest resolution
- Lock focus and exposure (tap and hold)
- Adjust exposure compensation if needed
- Use HDR for high-contrast scenes
- Avoid digital zoom (crop in editing instead)
DSLR/mirrorless settings (if using):
- Aperture: f/8-f/11 for sharp focus throughout product
- ISO: 100-400 (lowest possible for clean images)
- Shutter speed: 1/125 or faster (use tripod for slower)
- White balance: Match your light source (daylight, tungsten, etc.)
- Format: RAW for maximum editing flexibility
Editing Your Photos
Free Editing Software
Mobile apps:
Snapseed (free):
- Powerful editing tools
- Selective adjustments
- Healing tool for removing blemishes
- Perspective correction
- Available iOS and Android
VSCO (free with in-app purchases):
- Professional filters
- Advanced editing tools
- Consistent aesthetic
- Popular for product photography
Lightroom Mobile (free):
- Professional-grade editing
- Presets for consistency
- Sync with desktop Lightroom
- Powerful adjustment tools
Desktop software:
GIMP (free):
- Free Photoshop alternative
- Full-featured editing
- Background removal
- Steeper learning curve
Canva (free tier available):
- Simple editing and background removal
- Templates for product images
- Easy to use
- Good for beginners
Photopea (free, browser-based):
- Photoshop-like interface
- No download required
- Supports PSD files
- Powerful editing tools
Essential Edits
Basic adjustments:
- Crop and straighten: Remove distractions, align horizons
- Exposure: Brighten or darken overall image
- White balance: Correct color temperature (remove yellow/blue tints)
- Contrast: Add depth and dimension
- Highlights/Shadows: Recover detail in bright or dark areas
- Saturation: Adjust color intensity (don’t overdo)
- Sharpness: Add clarity and detail
Product-specific edits:
- Remove dust/blemishes: Healing or clone tool
- Clean up background: Remove distractions or imperfections
- Adjust colors: Ensure accurate product colors
- Remove background: Create pure white or transparent background
Consistency:
- Edit all product photos similarly
- Create presets or save settings
- Maintain consistent look across catalog
- Batch edit when possible
Background Removal
Automated tools (easiest):
- Remove.bg: Free for low-res, $0.20-$2 per image for high-res
- Canva background remover: Included in Pro ($12.99/month)
- Photoshop: Select Subject + Remove Background (if you have it)
Manual removal:
- Use selection tools (magic wand, lasso)
- Refine edges carefully
- Time-consuming but free
- Better control over results
Product-Specific Photography Tips
Clothing and Apparel
Flat lay method:
- Lay garment flat on clean surface
- Smooth wrinkles and arrange neatly
- Shoot from directly above
- Style with accessories
- Cost: $0
Mannequin or dress form:
- Shows fit and drape
- More dimensional than flat lay
- Mannequin: $30-$150
- Can remove mannequin in editing (“ghost mannequin” effect)
Model photography:
- Shows fit on real person
- Lifestyle appeal
- Ask friends/family to model (free)
- Hire models: $50-$200+/hour
Jewelry and Small Items
Macro/close-up photography:
- Get very close to show detail
- Use macro mode on phone or macro lens
- Ensure sharp focus
- Show craftsmanship and quality
Lightbox setup:
- Even, diffused lighting
- White background
- Eliminates shadows
- Professional look
Lifestyle shots:
- Jewelry on model or hand
- Styled with complementary items
- Shows scale and wearability
Food and Beverage
Natural light essential:
- Shoot near window
- Soft, diffused light
- Avoid artificial lighting (unflattering for food)
Styling:
- Use props (plates, utensils, linens)
- Show product in use or prepared
- Fresh, appetizing presentation
- Neutral backgrounds
Angles:
- 45-degree angle most flattering
- Overhead for flat dishes or arrangements
- Eye-level for tall items (drinks, bottles)
Home Goods and Furniture
Context is key:
- Show items in styled room settings
- Demonstrate scale and use
- Multiple angles and details
- Clean, uncluttered backgrounds
Detail shots:
- Close-ups of materials and textures
- Hardware and construction details
- Quality indicators
Batch Photography Workflow
Efficient Shooting Process
Prepare in advance:
- Clean and prep all products
- Set up lighting and background
- Charge camera/phone
- Clear memory card/storage
- Gather props if needed
Shoot systematically:
- Set up once, shoot multiple products
- Same angles for each product
- Take multiple shots of each angle
- Review as you go
- Reshoot if needed while setup is ready
Organize files:
- Create folders by product or shoot date
- Rename files descriptively
- Delete obvious bad shots immediately
- Back up files
Editing Workflow
- Select best shots: Choose 5-7 images per product
- Edit one fully: Perfect settings for one image
- Create preset: Save settings
- Batch apply: Apply preset to similar images
- Fine-tune: Adjust individual images as needed
- Export: Save in appropriate format and size
Common Photography Mistakes
Poor Lighting
Dark, shadowy, or inconsistent lighting makes products look unprofessional. Invest time in proper lighting setup.
Cluttered Backgrounds
Distracting backgrounds pull focus from product. Use clean, simple backgrounds.
Inconsistent Style
Different lighting, angles, or editing across products looks unprofessional. Maintain consistency.
Inaccurate Colors
Photos that don’t match actual product colors lead to returns. Ensure color accuracy.
Not Enough Images
One photo isn’t enough. Provide 5-7 images showing different angles and details.
Blurry or Out of Focus
Use tripod, ensure proper focus, and adequate lighting to avoid blur.
Over-Editing
Excessive filters or editing makes products look fake. Edit to enhance, not transform.
The Bottom Line
Professional-quality product photography is achievable on any budget using a smartphone camera (already in your pocket), natural window light (free), white poster board backgrounds ($5-$10), and a basic phone tripod ($10-$30) for sharp, consistent images. Set up a simple DIY studio by positioning a table perpendicular to a large window, creating a seamless white sweep with poster board taped to the wall and curved onto the table, placing products 2-3 feet from the window, and using a white reflector board opposite the window to fill shadows.
Shoot 5-7 images per product including straight-on eye-level shots showing products as customers would see them, 45-degree angles revealing depth and dimension, overhead flat lays for clothing and accessories, and detail close-ups showcasing textures, materials, and quality. Maintain consistent framing across all products by shooting from the same distance and angles, creating a cohesive professional catalog that builds brand recognition and trust.
Edit photos using free tools like Snapseed, VSCO, or Lightroom Mobile for smartphones, or GIMP, Canva, and Photopea for desktop, making essential adjustments including cropping and straightening, correcting exposure and white balance, adjusting contrast and saturation moderately, sharpening for clarity, and removing dust or blemishes. Create editing presets to maintain consistency across your catalog and batch edit similar products to save time.
Shoot efficiently by batching photography sessions—set up once and photograph multiple products, take multiple shots of each angle to ensure you have options, review images as you go to catch issues while the setup is ready, and organize files immediately into descriptive folders. Avoid common mistakes including poor lighting (invest time in proper setup), cluttered backgrounds (use clean simple backdrops), inconsistent style across products (maintain same lighting and angles), inaccurate colors (ensure photos match actual products), too few images (provide 5-7 per product), blurry shots (use tripod and proper focus), and over-editing (enhance rather than transform). Quality product photography increases conversion by 30%+ and reduces returns by setting accurate expectations—invest the time to do it right even on a zero-dollar budget.
Affiliate Disclosure: This article contains affiliate links to photography equipment and editing tools. If you purchase through these links, we may earn a commission at no additional cost to you. We only recommend tools we genuinely believe will help you create professional product photography on a budget.


